Here is a how to page about building stretchers for painting. First of all you should know that small store bought stretchers are fine up to a point. They save time in the making and some are even complete with stretched and primed canvas so you can begin painting right away.
As an artist you could also consider painting on other surfaces such as plywood which is dimensionally stable, very simple to find and easily prepared. It comes down to what you want to work on and how you imagine your finished work.
If you use store bought supports over eighteen inches brace the frame before use to strengthen it against buckling from the pressure exerted by shrinking canvas. You may also find the outer frame depth dimension under two inches requiring the work to be framed before sale, which is a very expensive way to work. I much prefer to build a simple stretcher for work over twelve inches square and if it is successful it may or may not be framed. I also would use a heavier weight canvas than provided on the store bought frames.
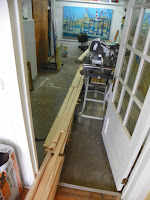
Having a working sawmill in your area to buy dry milled lumber is really lucky. Building supply stores also sell wood suitable for building stretchers. Wood can be purchased in various nominal dimensions. 1"x2" will do just fine for frame braces and 1"x3" will be milled to 2". You will be looking for pine boards with no knots which are called "clear" and are easiest to work with. If the wood has knots you will need to work around them or cut them out. Allow about ten percent extra material in the length for knots.
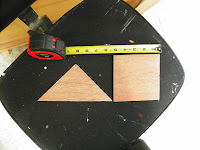
You will also need some 1.5" nails and carpenters glue and a 1/4 sheet of 3/16" meranti plywood , also available at building supply stores which you will cut to serve as gussetts. A heavy stapler and 3/8" staples will attach the gussetes in place
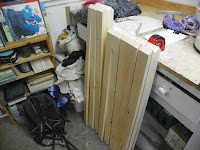
Once I have the wood home I let it sit for at least four days to warm up and dry even more. Then I cut the 1"x3" to 2" on a table saw and add a chamfer or fortyfive degree cut along what will be the top edge.
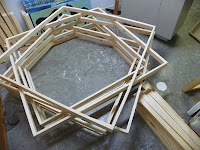
Cut the wood to the finished lengths with a forty five degree angle.
Glue all the corner cuts and fasten the pieces with two nails on each corner. Set this aside to dry for a day.
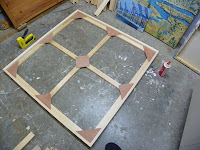
Then using the 1"x2" boards measure the inside of the frame and cut a forty five degree angle on the flat side of the board. This should fit snuggly in the frame. Continue until all four sides have been braced gluing all the inside edges before nailing it all together. Check the frame to ensure a square using a carpenters square and measure from corner to corner. The measurement should be equal. Corners can then be braced with plywood gussetts glued and stapled into place as well as intermediate braces set into the frame back.


